
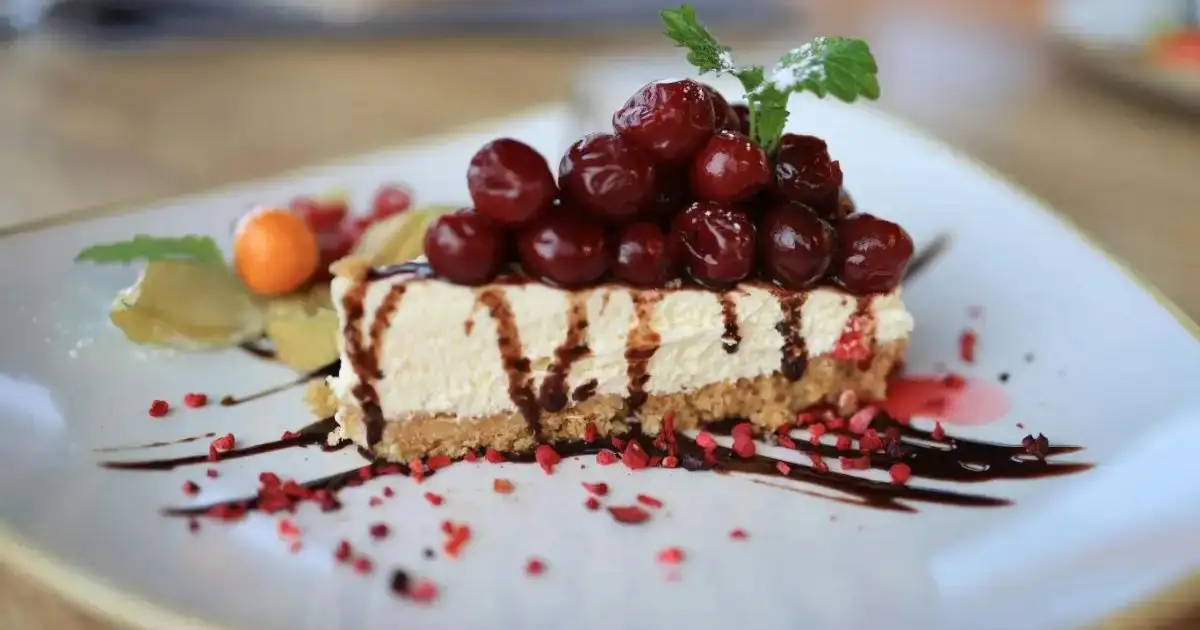
Who can resist the allure of a smooth and creamy Cherry Cheesecake? This dessert isn’t just a treat for your taste buds—it’s a show-stopping centerpiece for any occasion. Whether you’re planning a cozy family dinner or hosting a celebration, this homemade cheesecake will leave everyone asking for seconds.
What makes this recipe special? It combines the tangy sweetness of cherries with the rich, velvety texture of cream cheese, all on a perfectly crisp graham cracker crust. Don’t worry if you’re new to cheesecake-making—this step-by-step guide ensures foolproof results every time. Ready to create a dessert that’s as impressive as it is indulgent? Let’s get started!
Key Benefits of Making This Cherry Cheesecake
Why is this Cherry Cheesecake recipe a must-try? Here are some irresistible reasons:
- Rich and Creamy Texture: The velvety filling melts in your mouth, offering the perfect balance of sweetness and tanginess.
- Simple Ingredients, Big Flavor: With easy-to-find ingredients like cream cheese, cherries, and a graham cracker crust, this dessert is both accessible and indulgent.
- Perfect for Any Occasion: Whether it’s a casual weekend treat or the star dessert at a dinner party, this cheesecake fits every celebration.
- Beginner-Friendly: You don’t need to be a professional baker to achieve a smooth, crack-free cheesecake—this recipe walks you through every step.
- Customizable: From adding a chocolate drizzle to trying a no-bake variation, this recipe offers endless possibilities to suit your taste.
Not only does this Cherry Cheesecake impress with its taste and texture, but it’s also a breeze to make, ensuring that even novice bakers can achieve professional-looking results. Let’s dive into the details and make this dreamy dessert a reality!
Ingredients for Cherry Cheesecake
Before we dive into the fun part of baking, let’s gather all the ingredients you’ll need. I’ve included simple, easy-to-find ingredients that will make your Cherry Cheesecake smooth, creamy, and absolutely delicious!
- 🍒 Fresh or Frozen Cherries (1 ½ cups) – These will be your sweet, tangy topping. If you prefer, you can also use cherry pie filling for a shortcut.
- 🧀 Cream Cheese (2 packs/16 oz) – The star of the filling! Make sure it’s softened to room temperature for easy mixing.
- 🍬 Granulated Sugar (1 cup) – Sweeten up the filling just right.
- 🧂 Vanilla Extract (1 teaspoon) – Adds that rich, warm flavor to the cheesecake.
- 🍯 Sour Cream (1 cup) – Adds a subtle tang and smooth texture to the filling.
- 🍪 Graham Crackers (1 ½ cups crushed) – This forms the perfect, buttery base for your cheesecake.
- 🧈 Butter (1/4 cup, melted) – Helps bind the graham cracker crumbs into a firm crust.
- 🍳 Eggs (3 large) – For a smooth, rich texture in the cheesecake filling.
These ingredients come together to create the perfect balance of sweetness and creaminess. Be sure to have everything on hand before you start—you’ll be amazed at how easily it all comes together!
Now that we’ve gathered our ingredients, it’s time to get baking! Let’s move on to the next step and create something truly special.
How to Make Cherry Cheesecake Recipe
Ready to make this delicious, creamy Cherry Cheesecake? Let’s break it down step by step, so you can enjoy the process and feel confident creating this dessert at home.
1-Prepare the Crust
- Preheat your oven to 325°F (163°C).
- In a bowl, combine the crushed graham crackers with the melted butter. Stir until the crumbs are evenly coated.
- Press this mixture into the bottom of a springform pan, creating a smooth, even crust. Use the back of a spoon to press down firmly.
- Bake for 8-10 minutes, then remove from the oven and let it cool while you work on the filling.
2-Make the Cheesecake Filling
- In a large mixing bowl, beat the cream cheese until smooth and creamy. You can use an electric mixer or a hand whisk if you’re feeling strong!
- Gradually add the granulated sugar and continue beating until fully combined.
- Add in the sour cream and vanilla extract, mixing until smooth.
- Beat in the eggs one at a time, making sure each one is fully incorporated before adding the next. This ensures a smooth texture without lumps.
- Pour the mixture over the cooled graham cracker crust in the springform pan.
3-Bake the Cheesecake
- Bake the cheesecake in the preheated oven at 325°F (163°C) for about 55-60 minutes. You’ll know it’s ready when the edges are set, but the center still has a slight jiggle.
- Once done, turn off the oven and let the cheesecake cool inside with the door slightly open for about 1 hour. This helps prevent cracking.
- After an hour, transfer the cheesecake to the fridge and chill for at least 4 hours (or overnight) to allow it to fully set.
4-Prepare the Cherry Topping
- While the cheesecake is chilling, prepare the cherry topping 🍒. If you’re using fresh cherries, wash and pit them, then cut them in half. If you’re using frozen cherries, let them thaw and drain excess juice.
- Arrange the cherries on top of the cheesecake just before serving, or refrigerate the topping until you’re ready.
5-Serve and Enjoy
- Once the cheesecake has set and you’re ready to serve, release the sides of the springform pan and transfer the cheesecake to a serving platter.
- Top it with the fresh cherries and a dollop of whipped cream if you like.
- Slice and enjoy your homemade Cherry Cheesecake!
This simple yet stunning dessert is sure to impress, and with these easy-to-follow steps, you’ll make the perfect cherry cheesecake every time. Ready to share this sweet creation with your loved ones? Let’s move on to some pro tips to make it even better!
Pro Tips and Variations for the Perfect Cherry Cheesecake
Making a delicious Cherry Cheesecake is one thing, but making it perfect is another! Here are some pro tips and creative variations to elevate your cheesecake and make it truly exceptional.
Pro Tips for a Smooth, Crack-Free Cheesecake
- Soften Your Cream Cheese: Let your cream cheese come to room temperature before mixing. Cold cream cheese can cause lumps, which can ruin the silky texture of your cheesecake.
- Don’t Overmix: Once the eggs are added to the filling, mix just until incorporated. Overmixing can introduce air bubbles, which could cause cracks during baking.
- Bake in a Water Bath: For extra smoothness and to help prevent cracks, place your cheesecake pan in a larger pan filled with about an inch of hot water. This will create a gentle, even heat around the cheesecake as it bakes.
- Cool Gradually: After baking, let the cheesecake cool in the oven with the door cracked open for about an hour. This helps it set slowly and prevents sudden temperature changes that could cause cracks.
Creative Variations to Try
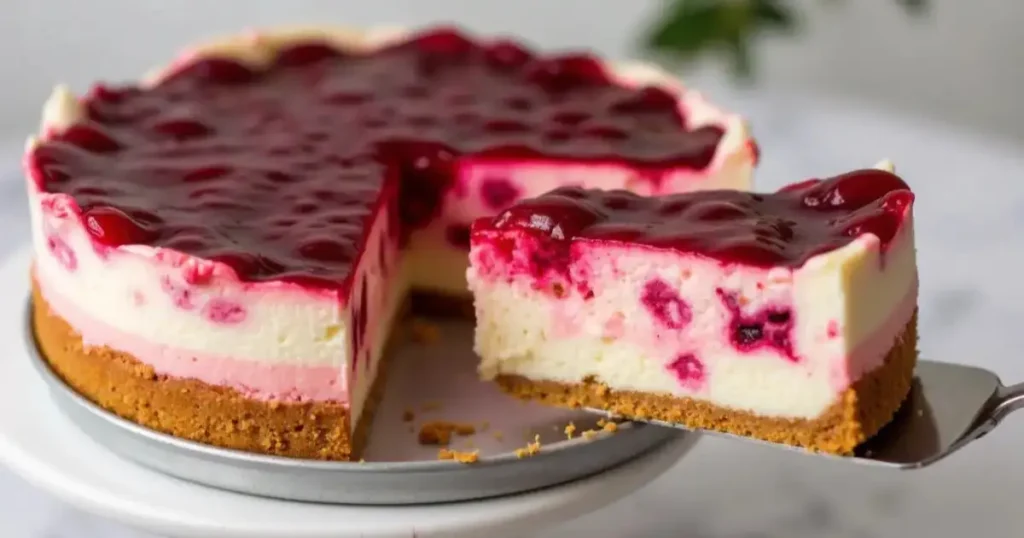
- Berry Cheesecake: Swap out the cherries for fresh berries like blueberries, raspberries, or strawberries for a colorful twist. You can even make a mixed berry topping!
- Chocolate Cherry Cheesecake: Add a swirl of melted chocolate into the filling before baking for a decadent chocolate-cherry combo.
- No-Bake Cheesecake: If you’re short on time or want a lighter version, skip the oven and make a no-bake version by mixing the filling ingredients with a little whipped cream, then chilling until set.
- Gluten-Free Crust: If you’re following a gluten-free diet, simply replace the graham crackers with gluten-free graham crackers or ground almonds for the crust.
- Lemon Zest: For a refreshing citrus twist, add some lemon zest to the cheesecake filling. The tangy flavor pairs perfectly with the sweet cherries on top.
Perfecting the Presentation
- Fresh Cherries vs. Canned: While canned cherries in syrup are convenient, fresh or frozen cherries often provide better flavor. If you’re using fresh cherries, try pitting them yourself to avoid the extra liquid from canned versions.
- Garnishes: A simple garnish of whipped cream or a drizzle of chocolate sauce can make your cheesecake look as impressive as it tastes. You can also add a sprinkle of crushed graham crackers for texture.
With these tips and variations, you can customize your Cherry Cheesecake to suit your tastes and make it even more impressive. Whether you’re making it for a holiday, a family gathering, or just because, these simple tricks will ensure your cheesecake is a showstopper!
Serving Suggestions for Cherry Cheesecake
Now that you’ve created your beautiful Cherry Cheesecake, it’s time to think about how to serve and enjoy it! Whether you’re hosting a dinner party or simply treating yourself, these serving suggestions will help you make the most of this delicious dessert.
Classic Presentation
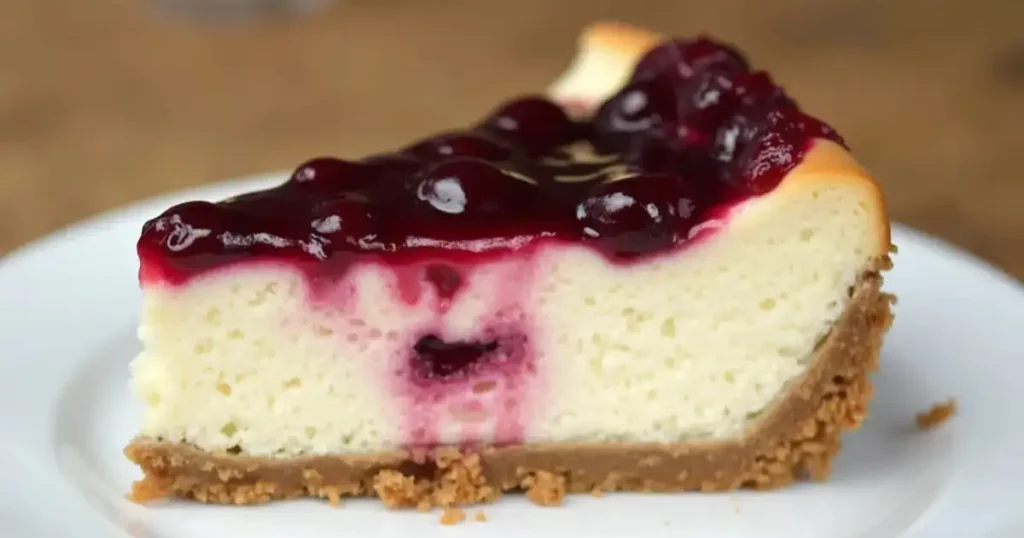
- Serve as Slices: For the perfect serving size, slice your cheesecake into wedges, making sure to cut with a sharp knife for clean edges.
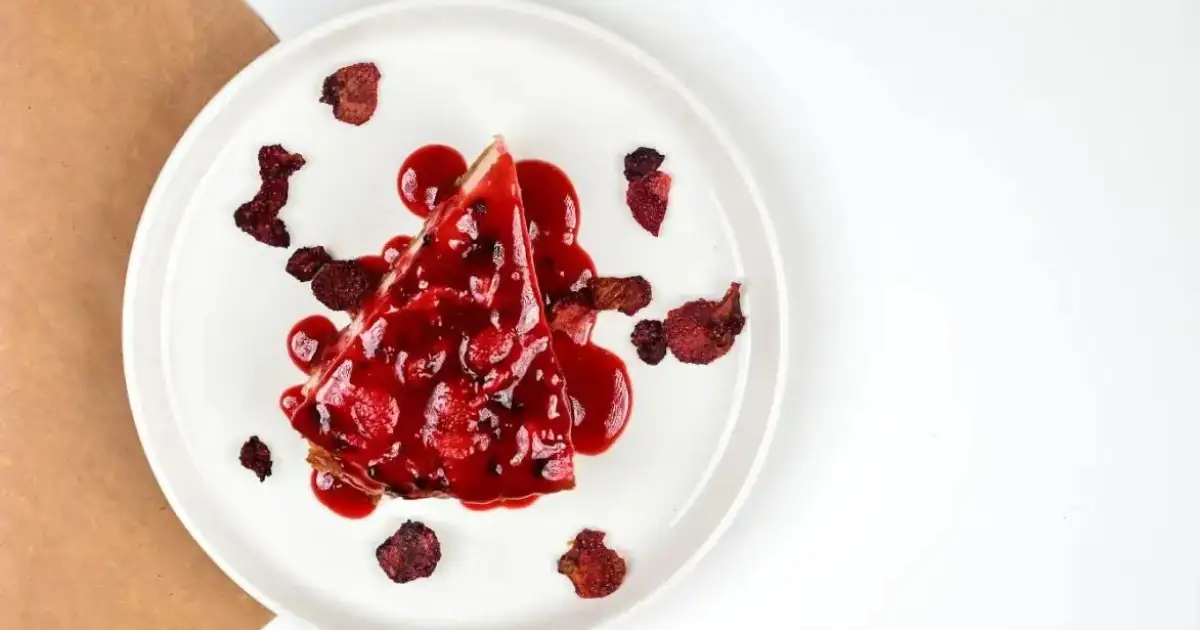
- Topping: Top each slice with fresh cherries, or add a drizzle of cherry syrup or compote for an extra burst of flavor. You can even sprinkle a bit of whipped cream to make it extra indulgent.
- Garnishes: Add a sprinkle of crushed graham cracker crumbs around the edge of the plate to echo the crust and enhance the presentation. A few mint leaves or a dusting of powdered sugar can also make it look extra fancy!
For a Light and Refreshing Twist
- Pair with Fresh Fruit: Serve your cheesecake with a side of fresh seasonal fruit, such as sliced strawberries, blueberries, or kiwi, to balance out the richness of the cheesecake.
- Chilled Beverage Pairing: A chilled glass of iced tea or sparkling water can be the perfect complement to this creamy dessert, cleansing the palate between bites.
Perfect for Special Occasions
- For Parties: If you’re serving this cheesecake at a special event, consider making mini cheesecake bites by preparing individual servings in small tart pans or muffin tins. You can top each bite with a cherry or small dollop of cream to make them party-ready.
- Holiday Dessert: Cherry Cheesecake is perfect for holidays or special celebrations like birthdays and anniversaries. If you’re making it for a festive occasion, consider adding decorative touches like edible gold flakes or themed sprinkles.
Leftovers (If There Are Any!)
- Storage: Keep any leftover cheesecake covered in the fridge for up to 3-4 days. To keep the cherry topping fresh, store it separately in an airtight container and add it just before serving.
- Freezing: You can also freeze leftover cheesecake for up to a month. Simply wrap individual slices tightly in plastic wrap and then foil. Thaw overnight in the fridge for the best texture when you’re ready to enjoy again.
These simple but thoughtful serving suggestions will make your Cherry Cheesecake even more enjoyable. From casual family dinners to impressive party platters, this dessert is sure to shine!
Related Recipes
If you loved this cherry cheesecake, try these similar recipes:
- Tres leches cake: Tres leches cake, a soft and moist cake soaked in three types of milk, is perfect for special occasions or indulgent desserts.
Conclusion: Your Perfect Cherry Cheesecake Awaits
Congratulations, you’ve made it to the end of this delicious journey! Your homemade Cherry Cheesecake is now ready to impress and delight anyone lucky enough to take a bite. With its creamy filling, buttery graham cracker crust, and the burst of fresh cherries on top, this dessert is sure to become a favorite.
Whether you’re celebrating a special occasion or simply indulging in a sweet treat, this cheesecake will make the moment unforgettable. Remember, baking is all about having fun and experimenting with flavors and toppings. Feel free to try the variations and tips we’ve discussed, and make this recipe your own.
Now, it’s time to enjoy every bite and share your creation with family and friends! Ready for your next baking adventure? Stay tuned for more mouthwatering recipes to inspire you in the kitchen!
FAQs About Cherry Cheesecake Recipe
Have questions about making your Cherry Cheesecake? Don’t worry, I’ve got you covered! Below, I’ve answered some of the most common questions to help you bake the perfect cheesecake with ease.
1. Can I make this Cherry Cheesecake ahead of time?
Absolutely! In fact, cheesecake tastes even better after it has had time to chill and set. I recommend making your cheesecake a day in advance and letting it chill overnight. This ensures that the flavors meld together perfectly, and the texture becomes even smoother.
2. How do I prevent cracks in my cheesecake?
Cracking is a common concern when baking cheesecakes, but it can be avoided with a few simple steps:
- Don’t overmix the batter.
- Bake at a lower temperature and let the cheesecake cool gradually in the oven with the door ajar.
- Use a water bath for extra moisture during baking.
3. Can I use a different fruit topping?
Yes! You can easily swap the cherries for other fruits like strawberries, blueberries, or raspberries. Feel free to experiment with your favorite fruits for a personalized twist. You can also make a mixed berry topping for a colorful and flavorful addition.
4. Can I use a different crust for my cheesecake?
Certainly! While the graham cracker crust is traditional, you can use crushed cookies like digestive biscuits, chocolate cookies, or even a pecan crust for a unique flavor. Just remember to press it firmly into the pan for an even base.
5. How do I store leftover cheesecake?
If you have any leftovers (which is rare with such a delicious dessert!), store the cheesecake in an airtight container in the fridge for up to 3-4 days. For longer storage, you can freeze the cheesecake. Just wrap individual slices tightly in plastic wrap and foil, then freeze for up to a month. Thaw overnight in the fridge before serving.
6. Can I make a gluten-free version of this cheesecake?
Yes! To make your Cherry Cheesecake gluten-free, simply use gluten-free graham crackers or substitute the graham cracker crust with crushed almonds or a gluten-free cookie crust. The filling is naturally gluten-free as long as you don’t add any wheat-based ingredients.
7. What can I do if my cheesecake is too sweet?
If you find your cheesecake too sweet for your liking, try adding a squeeze of lemon juice or a bit of sour cream to balance the flavors. The tanginess will help cut through the sweetness and enhance the overall taste.
I hope these answers help make your baking experience even smoother! If you have any other questions, feel free to reach out. Enjoy your homemade Cherry Cheesecake, and happy baking!
Recipe Recap: Cherry Cheesecake Recipe
Recipe Details
- Prep Time: 25 minutes
- Cook Time: 1 hour 15 minutes
- Total Time: 6 hours (including cooling)
- Servings: 8-10 slices
- Calories: Approximately 350-400 calories per slice
Nutrition Information (Per Serving)
- Calories: 375
- Fat: 24g
- Saturated Fat: 14g
- Cholesterol: 80mg
- Sodium: 250mg
- Carbohydrates: 35g
- Fiber: 1g
- Sugars: 26g
- Protein: 5g
- Calcium: 80mg
- Iron: 1mg
Categorize the Recipe
- Course: Dessert
- Cuisine: American
- Diet: Vegetarian
- Method: Baking
- Keyword: Cherry Cheesecake, Homemade Cheesecake, Creamy Cheesecake, No Crack Cheesecake
- Skill Level: Intermediate
This Cherry Cheesecake is the perfect blend of creamy and tangy flavors, with a crispy graham cracker crust and sweet cherry topping. It’s a delicious dessert that will wow any crowd! Whether you’re preparing it for a special occasion or a simple family gathering, this recipe guarantees a perfect dessert every time.
1 thought on “Cherry Cheesecake Recipe: How to Make It Smooth and Creamy”